Sandpaper
Sandpaper acts by gouging fine slivers from the wood surface, leaving scratches, the size of which is governed by the size of the grits on the paper. Coarse grits act rapidly, but the scratches they leave are conspicuous, especially if they cross the grain of the wood. Fine grits act slowly, but the scratches left are too small to see. Scratches are least noticeable when they run with the grain of a wood. Scratches must be especially fine to escape detection on a wood with close texture, such as maple, and must be still finer to remain unnoticed if they cross the grain of the wood.
In sanding a floor, time is saved by starting with coarse sandpaper to remove the grosser roughness and imperfections and to make the floor level as quickly as possible. The scratches left by the coarse grits are then removed by successive sandings with a finer sandpaper. The scratches left by the last paper should be too small to be observed even after the finish has been applied.

Sanding Procedures
Before beginning the sanding procedure carefully sweep all dirt, dust and other debris from the floor. "Set" all nails that may be protruding either in the floor or baseboard so that the sanding machine will not be damaged. Sometimes, only two sanding cuts are needed on a new hardwood floor, but if the floor is at all uneven or if a particularly smooth finish is desired, three cuts will be necessary. The first cuts should be done with a coarse or medium abrasive, always ending with a fine abrasive. A smoother finish will result if the final sanding is done with the floor polisher or disk sander. Of course, more passes with finer paper will result in a smoother finish.
Note: After the second or third pass, the floor may be buffed with steel wool using a machine. However, steel wool should not be used on oak floors unprotected by finish because minute particles of steel left in the wood may later cause iron stains under certain conditions. When sanding strip, plank, or other flooring where all pieces run parallel to each other, all cuts may be made in the direction of the strips, However, if the floor is at all uneven, one of the first cuts using coarse or medium paper should be at a 450 angle to the direction of the strips. This positioning will remove any peaks or valleys caused by minute variation in thickness of the strips or in the subfloor. When sanding parquet, block, herringbone and similar flooring, it is necessary to cross the grain of many pieces with each pass. In these cases, begin sanding on a diagonal from one corner of the room to the other. The next cut is started from one remaining corner to the other, and the final cut is made at approximately 45 degrees to the first cut (from one wall to the opposite wall). Extra care should be taken to see that each pass after the first is deep enough to remove all scratches left by the previous sanding. The last pass should be made with relatively fine sandpaper.
Regardless of the type of floor being sanded, an edger should be used after each pass to finish any areas which were not previously sanded such as edges, corners and areas around radiators. These areas may also be hand sanded. Before the sanding is considered complete, the floor should be inspected carefully to see that all blemishes and visible scratches have been removed and that a smooth surface has been produced. Defects can be seen most readily if the floor is viewed against light at a low angle of incidence so that any ridges will cast shadows. Any defects left at this time will show much more prominently after finishing materials have been applied.
If an old finish cannot be satisfactorily repaired, a complete sanding of the surface and then application of a new finish may be necessary. Most flooring is 3/4-inch thick so it can withstand a number of sandings. In these cases, make certain that all nails are countersunk and that the floor is as clean as possible before sanding. Use an "open face" paper to remove the old finish. The heat and abrasion of the sanding operation may make the old finish gummy and will quickly clog normal sandpaper. Once new wood appears, regular sandpaper may be used.
The number of cuts required to restore an old floor is largely determined by the condition of the floor and the thickness of the finish being removed. If the floor is badly scarred or warped, use as many cuts as necessary to get a smooth, unblemished surface. Make the first one or two cuts at a 45 degree angle with medium grit paper, and then follow the instructions given for sanding a new floor. If the surface is in good shape and has no thick build-up of old finish and wax, one pass with the disk sander and extra-fine paper may be sufficient. Just be sure that you have removed all the old finish.
Old finishes may also be removed with a non-aqueous (no water) varnish remover, after which the floor should be sanded as for new flooring. If the floor is less than 3/4 inch thick or if it is made from hardwood plywood, care must be exercised to prevent sanding through to the less desirable wood beneath. The floor thickness can usually be determined by removing a floor heating register or the shoe mold and baseboard so that an edge of the floor is exposed. When refinishing these floors a chemical varnish remover may be useful. It will also help to use a floor polisher or disk sander rather than the drum sander. Do not remove more wood than absolutely necessary.
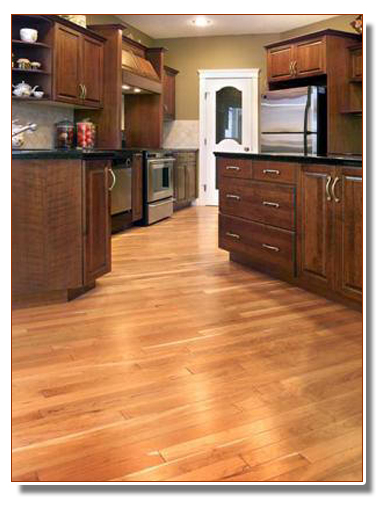
Finishing a wood floor is perhaps one of the most critical but rewarding steps. Finishes are applied to wood for two principal reasons. First, a finish should protect the wood from damage such as stains, moisture and mechanical wear. Second, a properly applied clear finish will accentuate woods' natural beauty and color. Penetrating seals (sealers) and surface finishes are the two principal types of protective coatings used on wood floors. Either will give satisfactory performance if applied correctly.
Penetrating Seals
Penetrating seals are probably the most common finish on residential floors. Sealers are usually thinned varnishes which, when applied to wood, will penetrate into the wood pores on the surface. The result is usually a low gloss or satin finish that wears only as the wood wears. The eventual effects of traffic are far less apparent than with other finishes that only coat the surface. Scratching and chipping of this finish is not a serious problem. One coat of a penetrating sealer can give satisfactory performance, but two coats are generally better.
There are two basic types of sealers. Normal (slow drying) sealers can be used successfully by most anyone. Fast drying sealers are more difficult to use since it is easy to form lap marks or a splotchy appearance. Therefore, they are usually applied only by experienced professionals.
Surface Finishes
Surface finishes which are relatively easy to apply and will give satisfactory service include polyurethanes, varnish, shellac, lacquer and some others. The polyurethanes are some of the most popular surface finishes because of their high resistance to moisture, mechanical wear, stains and spills. They are available with a high gloss or matte finish. Polyurethanes are either oil modified or moisture-cured. The oil modified types are the easiest to apply.
Varnishes can also give satisfactory performance. However, varnishes do have a greater tendency to scratch, and worn spots are difficult to patch without showing lines between the old and new finish. Varnishes specifically designated for floors tend to be more durable. A glossy or matte finish is available. Varnishes may be based on phenolic, alkyd, epoxy or polyurethane resins. Shellac and lacquer are sometimes used as floor finishes. These finishes will dry rapidly, and more than one coat can often be applied in the same day. However, shellac and lacquer are not as resistant to moisture, spills and mechanical wear as are the penetrating sealers, polyurethanes and varnishes.
Surface finishes will usually give a longer life than penetrating sealers without any attention other than regular sweeping or dry mopping. However, when surface finishes must be renewed, it is usually necessary to refinish the entire room.
Staining
In most cases, it is preferable to maintain the natural color of hardwood floors by using a clear finish. However, if a color different than the natural wood color is desired or if the natural wood color is too variable, a stain may be used. Stains do not penetrate wood deeply, and they may fade with continued exposure to bright light. Open grained woods such as oak, ash, pecan and walnut will take stain easily while the close grained woods such as maple, and to a lesser extent, birch and beech, will take stain much more slowly. Soft-woods do not stain well since the less dense springwood easily stains dark whereas the dense latewood will hardly stain at all. Be certain to use "non-grain-raising'" stains. Take the same care in cleaning and preparing a surface to be stained as would be done in finishing it.
Oil-based pigmented wiping stains are probably the most common. The pigments are in suspension so the material must be stirred regularly during use to maintain a uniform color. The pigment collects in the open pores of the wood and thus accentuates the grain pattern and alters the wood color. Pigmented stains are usually applied by brushing. After the stain has penetrated the surface and the desired effect is achieved, all excess is wiped off with clean rags. Colored or pigmented penetrating sealers are also available. In this case, the pigment is mixed with the sealer, and both are applied at the same time. Pigmented penetrating sealers will not obscure the natural wood grain or shorten the life of the floor. Varnish stains are similar to penetrating sealers since the coloring pigment is formulated with the varnish. Therefore, the wood is colored at the same time it is finished. Since the coloring pigment remains in the varnish as it cures on the surface, much of the natural wood grain and color is obscured.
Certain application precautions are necessary to appropriately finish wood floors.
- Dust and dirt are an important factor in causing a rough surface. When applying the first coat of finish, be certain that the wood is perfectly clean and free of dust, dirt and other foreign materials. Dust and dirt must also be removed from cracks or other floor irregularities. The walls, windows and doors should also be cleaned to keep dust motes from dropping into wet finishing materials to mar their appearance. A painter's tack rag or turpentine-dampened rag will help pick up much of this dirt. A careful cleaning is also necessary before a second or third coat of finish is applied.
- Most finishes will not stick to wax, oil and other materials which may contaminate the surface. Be certain that the finish is applied only to bare, clean wood.
- The temperature of the floor, room and finishing solution should be about 70 degrees F or somewhat warmer to assure that the finish flows on evenly and cures properly.
- Most finishes cure faster in dry weather. Therefore low humidity conditions are also ideal.
- A rough finish can also result if dust or small piece of dried finish are transferred from an old applicator or from a partially used can of finish. For each job, it is probably best to start with a new applicator and supply of finish.
- Provide adequate ventilation to carry off any fumes.
- Application of finishing materials should begin promptly after sanding so that there will be no time for changing moisture conditions to raise the wood grain.
Penetrating Sealers
Penetrating sealers are best mopped on using a clean string mop or long-handled applicator with a lamb's wool pad. Apply generous amounts of the sealer, making sure that final stroking is in the direction of the wood grain if possible. Any excess sealer which remains on the wood surface should be wiped up with a clean cloth or squeegee. A wide brush can also be used for application. After the first coat has dried it should be buffed with No. 2 steel wool. Buffing can be done by hand or with an electric polisher equipped with a steel wool pad. A second coat of penetrating seal will result in longer service life, but is not always necessary, particularly on close grained woods. Penetrating sealers can usually be refinished in heavy traffic areas without showing patch marks.
Polyurethanes
Polyurethanes may be applied using a brush or lamb's wool applicator. Because polyurethanes are a surface finish, care should be taken to work along the grain. Polyurethanes should be flowed on in a continuous manner so that the leading edge does not have time to dry out. After the first coat is thoroughly dry, buff it with steel wool, dust well and then apply the final coat.
Varnishes
Varnishes are usually applied with a brush and flowed on evenly and smoothly. The first coat can be thinned lightly so that it will penetrate into the wood like a sealer. After the first coat has dried, smooth it with fine sandpaper, dust well and then apply the top coat full strength.
For the final touch of beauty and to protect the finish, apply one or more coats of good wax recommended for use on floors. Use either a liquid buffing wax/cleaner or paste wax. Use only brands that are designated for hardwood floors and if a liquid, be sure it has a solvent base, not a water base.
Apply the wax after the finish coat is thoroughly dry and polish it with a machine buffer. The wax will give a lustrous sheen to the floor and form a protective film that prevents dirt from penetrating the finish. Some manufacturers of urethane finishes do not recommend waxing, especially for commercial jobs, because wax may make the floor slippery.
Wood floors finished with penetrating seals are not too difficult to repair should they show early signs of wear in the traffic channels or become stained or water damaged in localized areas. Floors finished with polyurethane or varnish can also be repaired, but lap marks or a splotchy appearance is more difficult to avoid. Floors finished with lacquer or shellac are nearly impossible to repair successfully.
Finishes are best renewed when they begin to show signs of wear in traffic channels but before the bare wood is exposed. In this case, the floor must be cleaned of all dirt and debris, and all floor wax must be removed as it may interfere with the drying and adhesion of any new finish. Most of the wax can be stripped with rags kept moistened with mineral spirits or other paint thinners. The rest of the wax should be washed off with soap and warm water, doing the work as rapidly as possible so that the water will have little time to contact the wood. After the surface has thoroughly dried, a new finish may be applied.
If a penetrating seal is being restored, apply it to the worn areas as already described. Be careful to wipe up any excess, particularly in those areas where the old
finish is still in good repair. If a surface finish such as polyurethane or varnish is being used, it may be a good idea to apply one coat of finish to the worn areas first. End all brush strokes at joints between boards. After the first coat is thoroughly dry, apply a second coat over the entire floor.
If only a small stained or water damaged area is being repaired, try to remove the discoloration first. Use steel wool or a fine grade of sandpaper to smooth out the affected area and an inch or two of the surrounding floor. Remove all dust. Then brush on one or more thin coats of finish, feathering it in to the old finish to prevent lap marks. All plenty of time for drying between coats. Wax the repaired area if appropriate.
This article was written by Anne Field, Extension Specialist, Emeritus with references from Finishing & Maintaining Wood Floors North Central Regional bulletin, Purdue Extension and the U.S. Forest Service.
|